
Brief
Gun Cleaning Basics: A Safe Step-by-Step Guide
Learn essential gun cleaning basics to ensure your firearm operates reliably and safely. Follow our quick step-by-step guide.
The fastest, safest way to keep a new firearm reliable: verify it’s unloaded, field-strip per the owner’s manual, clean the bore and action, apply a light coat of lubricant, reassemble, function-check, and store it securely. That sequence covers every essential step in gun cleaning basics and takes most new owners under 30 minutes.
Before you touch the gun, run this checklist:
- Remove the magazine and lock the action open
- Visually and physically inspect the chamber — finger in if safe to do so
- Move all ammunition out of the room
- Point the muzzle in a safe direction throughout
- Put on nitrile gloves and eye protection before opening any solvent
Safety rule, no exceptions: Verify the firearm is unloaded every single time before cleaning — check both the chamber and the magazine, and remove all ammunition from your workspace. Treat the gun as loaded until you have confirmed otherwise with your own eyes and hands.
Pro Tip: Never use WD-40 or household oils on a firearm. They attract debris, can harden inside the action, and cause malfunctions. Use dedicated gun solvents, lubricants, or a CLP product instead.
Key Takeaways
Consistent gun cleaning comes down to one non-negotiable habit: verify the firearm is unloaded every single time, then follow the manual for everything else.
| Point | Details |
|---|---|
| Verify unloaded first | Check chamber and magazine physically and visually, and remove all ammo from the workspace before cleaning. |
| Follow the owner’s manual | Model-specific disassembly steps prevent damaged springs, lost pins, and costly mistakes. |
| Clean bore breech to muzzle | Use a bore guide, run solvent-wet then dry patches until clean, and never push a dirty patch back through. |
| Lubricate sparingly | One drop per friction surface; never oil the firing-pin channel, bore before shooting, or magazine interior. |
| Store locked and dry | Keep unloaded in a locked safe with desiccant; inspect stored firearms every few months. |
| Blvista starter kits | Blvista stocks caliber-matched cleaning supplies for new owners at blvista.com. |
Table of Contents
- What safety steps should you complete before cleaning a gun?
- Why you must read the owner’s manual first
- What tools and supplies do you need for a basic cleaning kit?
- How to clean a gun: step-by-step for beginners
- How to lubricate a firearm correctly after cleaning
- Reassembly and function check after cleaning
- When should you clean and how should you store a firearm?
- Common mistakes beginners make and how to fix them
- When should you take a gun to a gunsmith instead of cleaning it yourself?
- Why consistent cleaning builds real confidence
- Get your beginner cleaning kit from Blvista
- Sources
What safety steps should you complete before cleaning a gun?
Safety is not a preliminary step you rush through. It is the cleaning session. Every accident during gun maintenance happens because someone skipped the verification step.
Work through this routine in order, every time:
- Point the muzzle in a safe direction before you do anything else.
- Remove the magazine or cylinder.
- Lock the action open and visually inspect the chamber under good light.
- Run a finger into the chamber to confirm it is empty.
- Move all loose ammunition to another room, not just another corner of the bench.
- Set the firearm on a cleaning mat with the muzzle still pointed safely.
Your workspace matters too. Choose a well-lit, well-ventilated area, ideally near an open window or with a fan running, since solvent fumes build up fast in enclosed spaces. A stable bench with a cleaning mat protects the finish and keeps small parts from rolling away. Wear nitrile gloves to keep solvent off your skin, and consider safety glasses if you are spraying CLP or solvent into tight spaces.
Lead exposure is a real concern. Lead dust from shooting and cleaning can pose a health hazard — wash your hands thoroughly after every cleaning session, never eat or drink at the cleaning bench, and keep children away from the area. Gloves and ventilation are not optional.
Pro Tip: Read the owner’s manual before you disassemble anything. Even if you have cleaned a similar model before, small design differences between manufacturers can mean a spring or pin comes loose in a way you did not expect.
Why you must read the owner’s manual first
No two firearms disassemble exactly the same way, and consulting the owner’s manual for model-specific disassembly and maintenance details is the single step most beginners skip. That manual tells you:
- Which parts to remove for a basic field-strip versus a full detail-strip
- Which fasteners have torque specs or require threadlocker (relevant when you get into firearm fastener care)
- Which small springs and pins should never be removed at home
- Whether the barrel requires a specific tool or technique to remove safely
If you bought the gun used and the manual is missing, go directly to the manufacturer’s website. Nearly every major brand posts free PDF manuals. Download it, save it, and read the disassembly section before you pick up a screwdriver.
One practical rule: if you encounter a cluster of small pins, coil springs, or detents during disassembly and the manual does not walk you through them, stop. Reassemble what you have and take the firearm to a gunsmith. A lost spring costs a few dollars to replace professionally; a damaged frame costs far more.
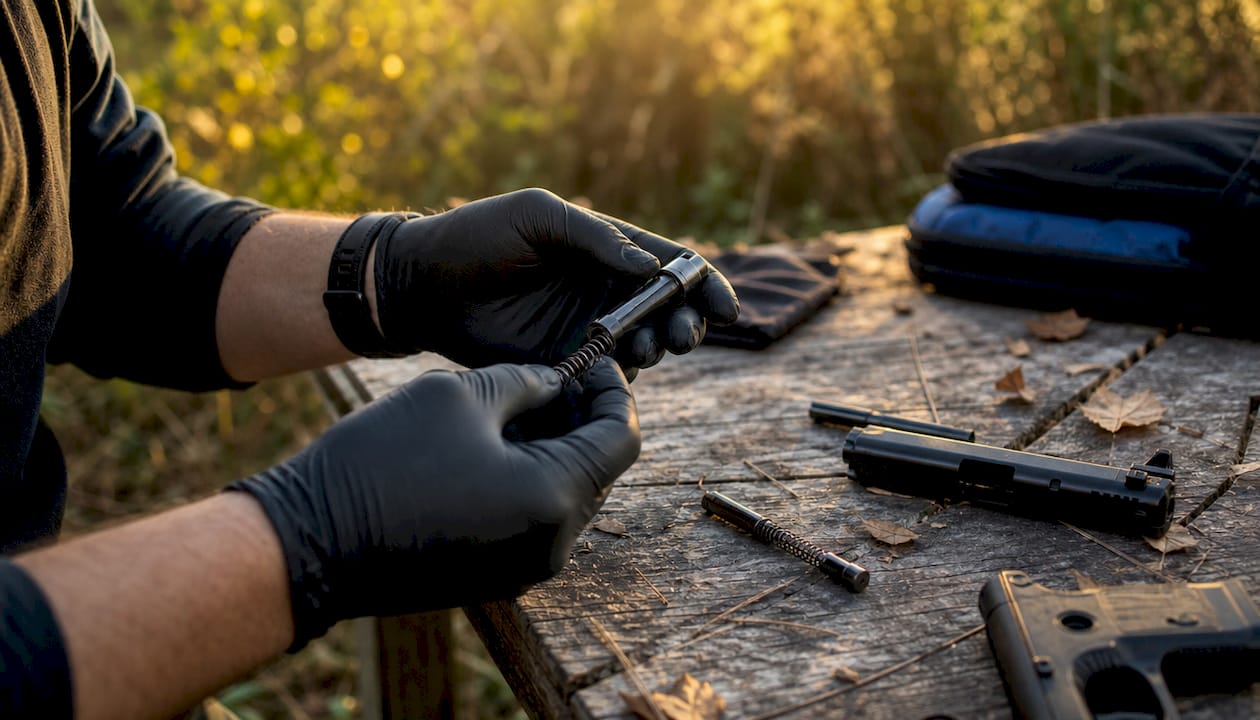
What tools and supplies do you need for a basic cleaning kit?
A beginner does not need an elaborate kit. The following items cover any handgun, rifle, or shotgun you are likely to own:
- Caliber-matched bore brush (bronze or nylon): loosens powder fouling and copper deposits from the rifling
- One-piece coated cleaning rod sized to your caliber: a rigid, coated rod protects the rifling better than the two-piece rods that flex and can scratch the bore
- Bore snake (optional but fast): a pull-through alternative for quick field cleans
- Jag and cleaning patches: the jag holds the patch snugly against the bore walls for a thorough wipe
- Bore guide: centers the rod at the breech end and protects the chamber from solvent drips and rod contact
- Solvent or CLP: Hoppe’s No. 9 is the classic bore solvent; a CLP (Cleaner-Lubricant-Preservative) like Break-Free CLP handles all three stages in one product
- Gun oil or dedicated lubricant: a thin, purpose-made oil for friction surfaces
- Utility brush or old toothbrush: scrubs carbon off the bolt face, slide rails, and action parts
- Cotton swabs: reach into tight corners the brush cannot
- Microfiber cloth: wipes the exterior without scratching the finish
- Cleaning mat: protects the bench and keeps small parts visible
Pro Tip: Avoid universal kits with multi-piece aluminum rods. They flex under pressure and the joints can scratch rifling. Spend a few extra dollars on a single-piece coated rod matched to your caliber — your bore will thank you.
How to clean a gun: step-by-step for beginners
Follow this sequence from start to finish. The practical beginner checklist is: field-strip, bore brush with solvent, patches until clean, brush action parts, lightly oil contact points, reassemble, and perform a function check.
- Verify unloaded — repeat the safety check from the opening section.
- Field-strip per the manual — remove the barrel, slide or bolt, recoil spring, and frame (exact parts vary by platform).
- Apply solvent to the bore brush and run it through the bore several times. Let the solvent dwell for 3–5 minutes to break down fouling.
- Run a wet patch through the bore on the jag, then a dry patch. Repeat until a patch comes out clean. Clean from the breech toward the muzzle when the platform allows, using a bore guide to protect the chamber.
- Scrub the action: use the utility brush on the bolt face, slide rails, barrel hood, and any carbon-heavy surfaces. Cotton swabs handle tight recesses.
- Clean the magazine: wipe the exterior, remove the baseplate if the manual allows, and brush out debris. Do not oil the inside of a magazine.
- Wipe the exterior with a lightly solvent-dampened cloth, then a dry microfiber cloth.
Platform-specific notes:
- Pistols: pay close attention to the slide rails and barrel hood, where carbon builds up fastest. On striker-fired guns, keep the firing-pin channel dry.
- AR-style rifles: the bolt carrier group and gas key accumulate heavy carbon. Soak the bolt carrier in solvent longer than you think necessary, and scrub the gas key thoroughly. For a deeper look at AR-15 and rifle platform options, platform knowledge helps you clean smarter.
- Shotguns: clean choke threads carefully and re-apply anti-seize compound before reinstalling. Avoid over-brushing a smooth bore.
- Revolvers: scrub the cylinder face and forcing cone, where unburned powder concentrates.
Quick-reference cleaning checklist:
- Unloaded and verified?
- Bore clean (patches running clear)?
- Action scrubbed and wiped?
- Magazine cleaned?
- Exterior wiped down?
- Ready to lubricate?
How to lubricate a firearm correctly after cleaning
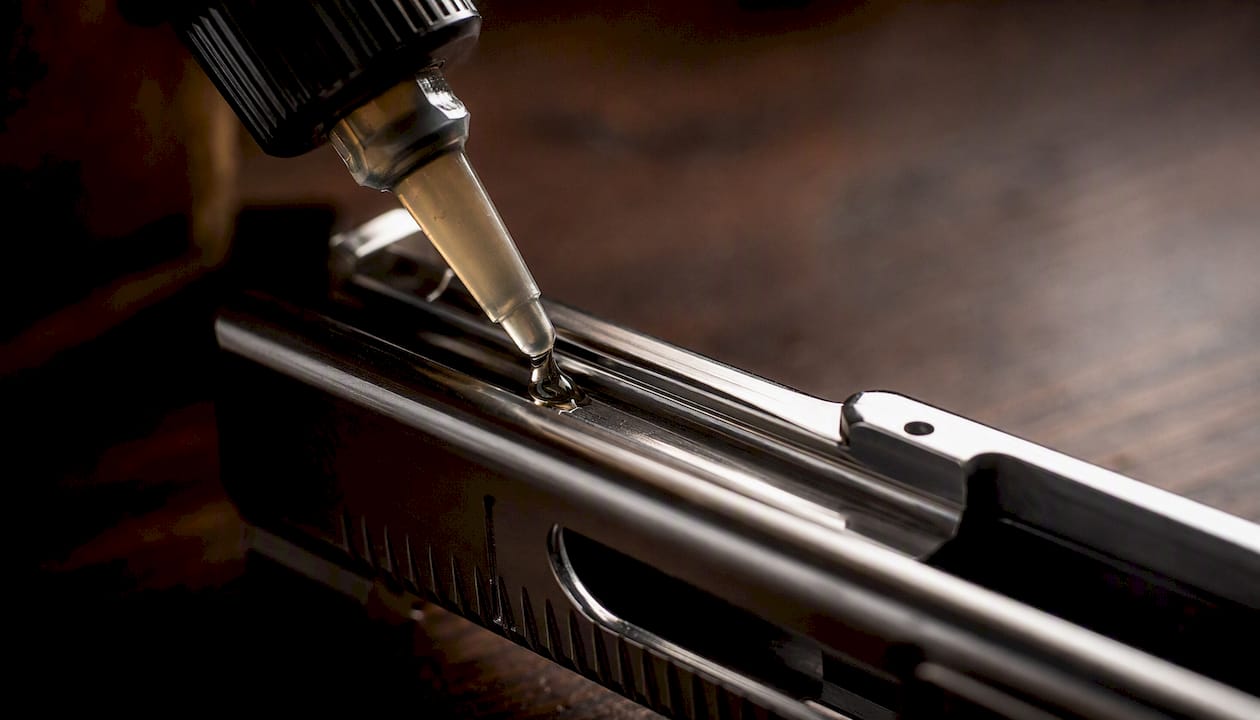
Lubrication follows a three-stage logic: clean with solvent, lubricate to reduce friction, protect with a thin preservative coat. A CLP product handles all three in one pass, which makes it the practical choice for most beginners. Separate products give more control for long-term storage or heavy copper fouling, but a quality CLP is sufficient for regular range use.
Do:
- Apply one drop of oil or a light smear of grease to each friction surface: slide rails, barrel hood, locking lugs, and the bolt’s cam pin area
- Use a cotton swab to spread oil evenly and remove any pooling
- Apply a very thin coat of oil to exterior metal surfaces if the firearm will be stored for more than a few weeks
Do not:
- Oil the bore before shooting — a wet bore can cause a dangerous pressure spike
- Oil the firing-pin channel or striker channel — oil there attracts debris and causes misfires
- Oil the inside of magazines — it migrates to the cartridge primers
- Flood any surface with oil; excess lubricant attracts grit and turns into a grinding paste
Pro Tip: For storage, a product like Hoppe’s No. 9 Lubricating Oil or a thin coat of CLP on metal surfaces prevents rust. For a gun you carry or shoot regularly, a lighter application keeps the action fast and clean. One drop per wear point is the rule — not a puddle.
Reassembly and function check after cleaning
Reassemble in the reverse order of your field-strip, following the manual. Before you seat the last component, scan the bench for leftover parts. A spring or pin sitting on the mat means something is not assembled correctly.
- Reassemble the barrel, recoil spring, and slide or bolt per the manual.
- Confirm the action cycles smoothly by hand before any other check.
- Point the muzzle in a safe direction and engage the safety — confirm it locks.
- Disengage the safety and press the trigger (dry-fire only where the manufacturer permits — check your manual).
- Rack the action and confirm the trigger resets.
- Inspect the ejection port and chamber one final time to confirm empty.
If the action feels stiff, gritty, or the trigger does not reset cleanly, stop. Re-disassemble and look for a misaligned part, an obstruction, or a component seated incorrectly. If the problem persists after a second careful reassembly, take the firearm to a gunsmith rather than forcing it.
When should you clean and how should you store a firearm?
Cleaning schedule:
- After every range session, even a short one
- After any exposure to rain, mud, or salt air — that day, not the following week
- A quick wipe-down after handling, since skin oils promote rust
- Monthly visual inspection for stored firearms; a full clean every 3–6 months if the gun sits unused
Storage checklist:
- Store unloaded and locked in a quick-access safe or secure storage
- Keep ammunition in a separate locked container
- Place desiccant packs inside the safe to control humidity
- Apply a light coat of oil to exterior metal before long-term storage
- Rotate stored firearms every few months for a visual inspection
They cost under $30 and run continuously without replacing desiccant packs.
Common mistakes beginners make and how to fix them
Skipping the chamber check is the most dangerous mistake, but it is far from the only one. Common errors include over-lubrication, using the wrong rod or brush size, and leaving solvent in the bore during storage — each one creates reliability problems that are easy to avoid.
Mistakes to avoid:
- Using WD-40 or household oils: dedicated firearm solvents and lubricants exist for a reason — household products attract debris and can harden inside the action
- Over-lubricating: excess oil migrates into the firing-pin channel and magazine, causing misfires
- Wrong brush or rod size: a brush too small for the bore does nothing; a rod too large damages the crown
- Pushing a dirty patch back through the bore: always pull patches in one direction, breech to muzzle, and use a fresh patch each pass
- Skipping the function check: reassembly errors show up here, not at the range
Troubleshooting quick fixes:
- Stuck residue: apply solvent, let it dwell 10 minutes, then scrub again
- Copper fouling: use a copper-specific solvent (Hoppe’s Bench Rest 9 or similar) and extend dwell time; repeat brush cycles
- Small rust spots: light solvent on a bronze brush, then oil immediately; for pitting, consult a gunsmith
- Solvent disposal: used patches and solvent are chemical waste — seal them in a plastic bag and follow your local hazardous-waste disposal guidelines; never pour solvent down a drain
When should you take a gun to a gunsmith instead of cleaning it yourself?
Some problems are beyond a cleaning session. Stop, secure the firearm unloaded, and contact a qualified gunsmith when you encounter:
- A missing, broken, or visibly damaged spring or pin
- Stripped screws or fasteners you cannot remove without forcing
- Deep pitting or corrosion inside the bore
- Cracks in the frame, slide, or barrel
- A firing-pin or striker that moves sluggishly or not at all after cleaning
- Persistent function failures after two careful reassemblies
- Any abnormal wear on locking surfaces or the barrel hood that affects how the action closes
The rule is simple: if you are not certain what a part does or whether it is seated correctly, do not force it. A gunsmith visit costs far less than a damaged firearm or a dangerous malfunction.
Why consistent cleaning builds real confidence
Most new gun owners treat cleaning as a chore to get through. That framing misses the point. Every time you field-strip a firearm, you learn something about how it works. After three or four sessions, you stop consulting the manual for every step. After ten, you can feel when something is off before you even run a patch through the bore.
Fouling, rust, and corrosion cause jams and dangerous malfunctions. Regular maintenance is not optional — it is a core responsibility of ownership. Blvista recommends starting with a quality CLP and a caliber-matched rod, reading the manufacturer’s manual cover to cover, and building the habit of cleaning after every range trip. A simple kit is enough to start. Competence follows repetition, not gear.
Get your beginner cleaning kit from Blvista
New gun owners do not need a $200 cleaning system. They need the right basics, matched to their caliber, from a source that knows the difference.
Blvista carries cleaning and maintenance supplies suited for beginners — bore brushes, patches, CLP, and microfiber cloths — so you can put together a functional starter kit without guesswork. Every component is sourced from trusted brands, and the Blvista team can point you toward the right caliber-specific items if you are unsure what fits your firearm. Always verify caliber compatibility before purchasing any brush or rod, and consult your manufacturer’s manual before using any new product on your firearm. Browse the full selection at Blvista and get set up before your next range trip.
Sources
For model-specific disassembly steps, always start with your firearm manufacturer’s website. Most brands post free PDF manuals. The sources below cover safety rules, platform-specific tips, and health considerations relevant to cleaning:
- How to Clean Your Gun
- How to Clean Your Guns: Tips from an Expert | Shooting Illustrated
- Firearm Maintenance and Cleaning (MSU Extension)
- Lead dust from firearms can pose a silent health risk | NPR
- Firearms Cleaning and Maintenance – Texas Parks and Wildlife
- How to Clean a Gun | How Often Should I Clean My Gun (Berry’s Manufacturing)
Recommended
Was this useful?